Saturday, June 29, 2013

Sunflowers

Graduation season is here again! This year I started with an order for Sunflower cupcakes in a flower pot. The customer sent me a picture she had found online and asked me to recreate it.

The final display!

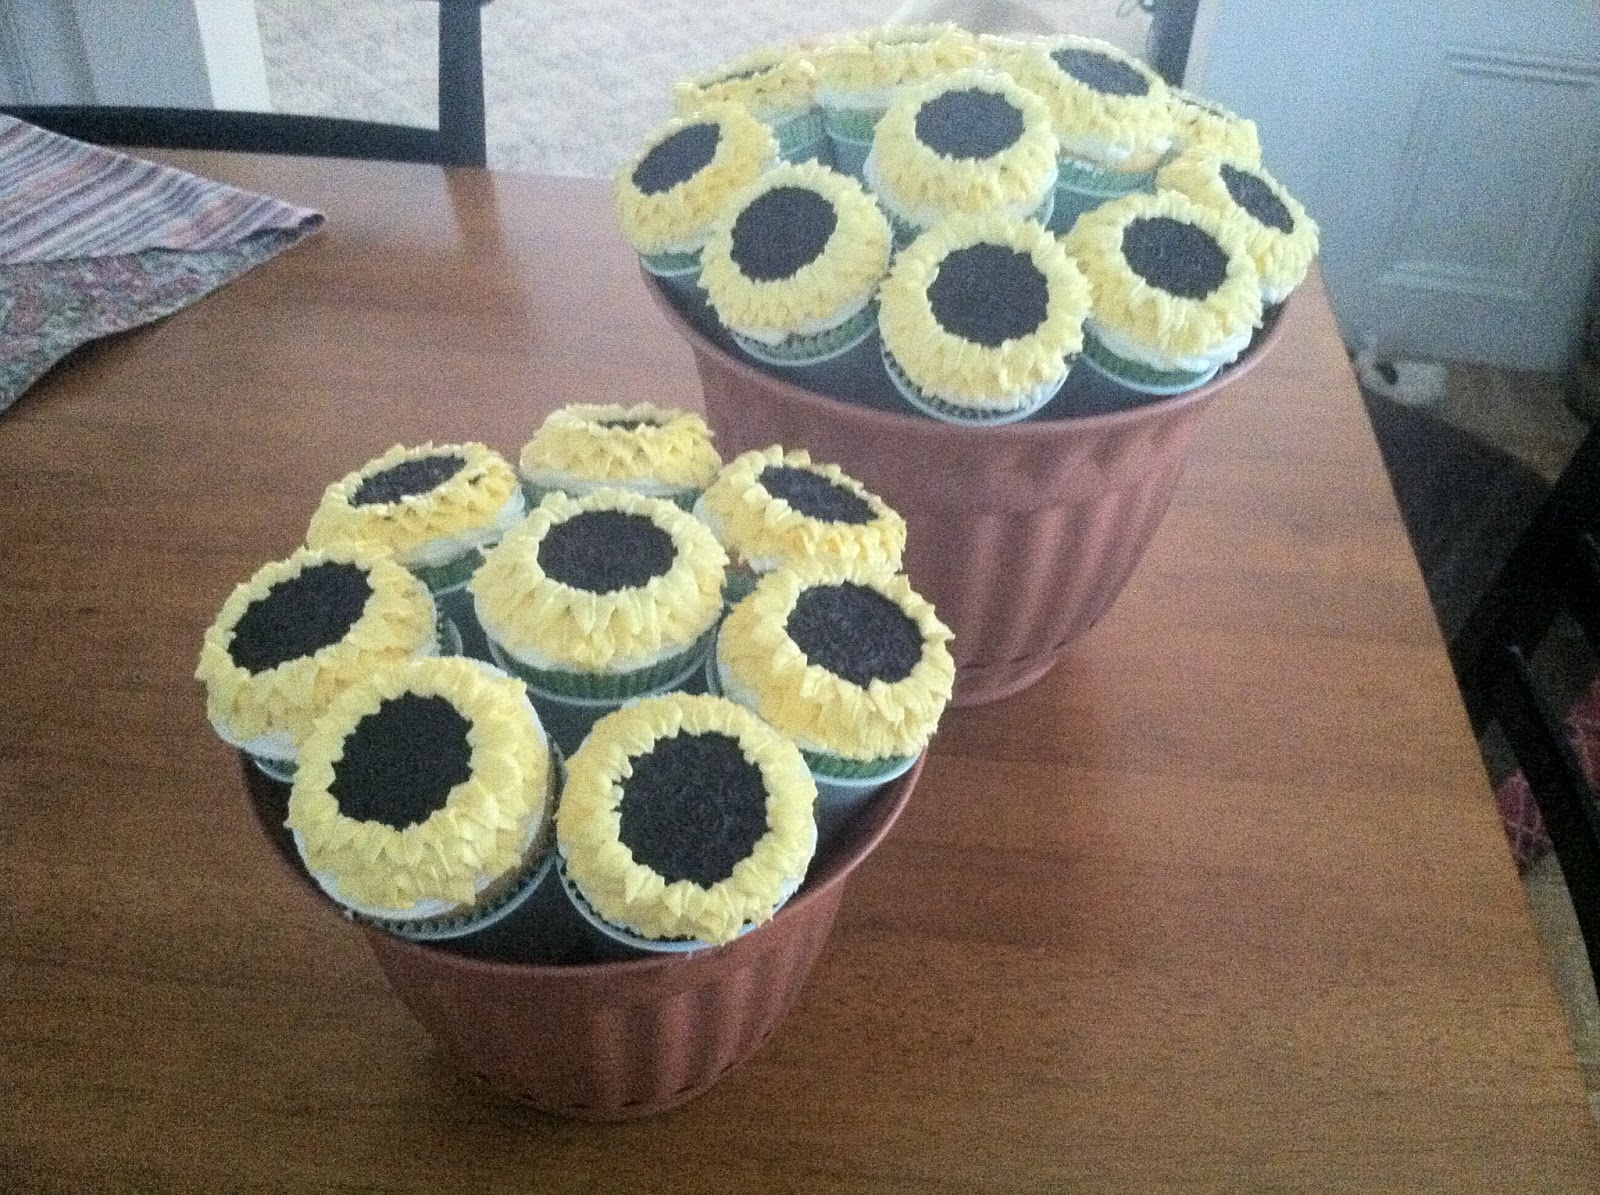
The most important part of this order was the flower pot. I had never done it before and had never seen it done, other than online. So there was a lot of guessing. I bought two different sized pots because I didn't know how many cups I could fit and I didn't want to go back out! I used 5oz plastic cup and a glue gun.I glued them in the middle outside of the cups so they'd be angled a bit. Once I had the outside cups glued, I did the cups in the center. The small pot only needed one, the larger needed 3. For those, I glued them on the outside bottom because the middle didn't touch any other cups. After they were all dried, I placed them inside the pots and glued three of the cups to the pot. I added a bow and TA-DAH!

The flower pots and cupcakes ready for delivery

To start with, I had to try many different styles to get the flower I wanted. Without the white swirl around the Oreo, the sunflower seemed too tall and awkward.The mini Oreos were too small for the sunflowers.

The failed trials.

The successful cupcakes started with the top of the cupcake sliced off to make a smooth flat surface. (Sorry I forgot to take a pictures!) I did a swirl of white icing around the edge of the cupcake, then put the Oreo in the center directly on the cupcake.


Using my tip # , I started putting pedals around the Oreo. I started at the bottom and went all the way around, then I did the next row started in between each prior pedal so they all showed and didn't just pile up. Once I got to the top of the Oreo, I did the pedals standing up so they'd "flop" over like pedals at the top of a flower do. I wiped my tip before each pedal so it had a clean edge.

A single finished Sunflower.


Tuesday, June 25, 2013

Wilton Cake Decorating Class - Day 4

My Wilton Decorating Basics class has come to an end, but not without a great final cake! 


We started the class learning how to make ribbon roses. I have to say, I'm so excited to know how to make roses! I've tried and tried, watched YouTube video after YouTube video, and I just couldn't get it! This is especially frustrating considering how easy Cake Boss and Cupcake Wars make it look! 


I'm still nowhere near as fast as good as Cake Boss, but at least I know the correct process and I can practice! 

This is my favorite of all my trials!

Next came our final cake. We were asked to bring a cake already frosted and ready to be decorated. I started with a chocolate cake with chocolate frosting because I wanted to bring it to my grandparents and my Papa has been asking for chocolate cake for as long as I've been baking. No better time than the present right?! 


Although I loved my roses, all 10 woman in the class were doing the same basic cake and I wanted to try something different. I love doing color blending and I thought Hydrangeas were the perfect flower to do. I started with light blue and dark blue in one bag with the 2M tip (big tip, closed star) I started with just the top three but decided that the cake needed something, and I didn't think a border would look right.


Well overall, this was such a great class. I learned more than I expected and I had such a good time. I'm so looking forward to signing up for the next class, once I'm able to drive again after my surgery. 

After much research, I'm even hoping to apply as a Wilton class instructor! They're always looking for new recruits and I'm especially interested in teaching little kids how to do it! I will keep you updated as I get more information :)


Tuesday, June 18, 2013

Wilton Cake Decorating Class - Day 3

My favorite part of the class has come and gone - CUPCAKES! The reason I started baking and decorating. I think cupcakes are the best thing to happen to  baking. Little cups of deliciousness made to eat on the go. They're my favorite thing to make and decorate, so this was the class I was most anxious for!


Although I know how to use most of my tips, it was great to learn the appropriate technique and uses for them. We practiced simple flowers and leaves, then we transformed them into beautiful cupcakes. It was so much fun! I loved each of my cupcakes and can't wait to make more of them. These were techniques and designs I never would have thought of for cupcakes! I usually just do the basic bakery swirl, but now my imagination is running wild!


These were my favorite four! The cupcake covered in all blue flowers is meant to look like a hydrangea, made special for Mommy because she loves them!

Stay tuned to see my final class cake next week!


Wednesday, June 12, 2013

Panera Bread MyInterest Article


The time has come! There is now an article to join my video on the My Panera website! 

Please follow the link below for some baking tips and share the video on Facebook or Twitter!


Please feel free to leave comments and thoughts! 


Monday, June 10, 2013

Wilton Cake Decorating Class - Day 2

Just because you're good at something, doesn't mean you know it all. And I certainly don't know all I can about cake decorating. So I decided to finally sign up for the Wilton Cake Decorating Basics at JoAnn's. Let me tell you, it's GREAT! Whether you've done it before or not, it's truly a great class. I've only completed the first two (of four) classes, but I've already learned so much. There are techniques that I've never seen and materials I've never heard of.

I recommend if you enjoy baking cakes or cupcakes, from a box or scratch, take this class. It's totally worth the money and time you invest into it. It's not cheap by any means, the class is less than $25 but there are materials that you need to purchase, and some that are optional but great to have. 

This week we worked on our first cake. I thought "Easy peezy, lemon squeezy!" Boy, was I wrong! Everything I thought I knew was wrong! This chick right here couldn't even frost a simple one layer circle cake without screwing it up. I should admit, I knew I was awful at it, but didn't know it could be so easy once I learned! That alone is going to save me so much time on cake orders. I usually end up covering the entire cake with decorations bc I can't ever get it smooth be crumb free. 


Sorry that photo is blurry! It was a rainy night and I was rushing to get a photo before I drove!

I'm excited for what else is in store for me. Next week we will be working on cupcakes! Stay tuned!

Sunday, June 9, 2013

Tangled!

Here we go with another new technique!
This week I started my first Wilton Cake Decorating class. It's something I've been wanting to do since I started, but winning my kit on Instragram really pushed me to finally sign up. And I'm so happy I did! I had my first of four classes on Monday and I've already learned so much and met some new ladies! While in class, I was talking to one of the woman about the Frozen Buttercream Transfer that I did last year. The Wilton instructor was very interested and we started discussing how she does just about the same thing, expect with royal icing. So I figured I'd give it a try!

Coloring page and royal icing ready to go.

I've never made of used royal icing so this was a whole new technique for me. I had an order to complete this weekend for a "Tangled" cake so I figured there was no better time than the present! I taped it to a cutting board and then taped wax paper over it. I mixed all my colors before hand and had all the tips I thought I'd need by my side. 

Mid-way through

Just like the Frozen Buttercream Transfer, I traced the coloring page and filled it in with frosting. I tried to blend the frosting the best I could. 

Finished product.

Once the entire coloring page was covered I used my finger to press down the icing so it would squeeze together and fill any air holes I may have left. Next, I placed it somewhere high so it would harden overnight. (Our cats seem to eat everything and anything they can get their paws on)

The scariest part of all!

The next morning, I checked the icing and it was as hard and I thought it would get. I did simple decorating on the cake so it wouldn't take away from the detail on Rapunzel. Now comes the part that makes my heart race, flipping my masterpiece onto the cake! I cut the wax paper off the cutting board and held it upside-down over the cake. I slowly pulled the wax paper from her head down as I placed her onto the cake. I did so well... Until I got to her dress and the weight became too much. She cracked!

She cracked :(

The drama queen that I am, freaked out and wanted to throw the whole cake across the room. Luckily I've got a calm mom, who told me to get my junk together and fix it - Thanks Mommy! I did simple swirls on the side to cover my terrible crumb icing coat. (I'm hoping Wilton teaches me how to do it better!) Although it didn't end up as great and detailed as my original, I'm pretty happy with the end result.

Tangled cake.

 In the future, I will make sure to coat the whole "topper" with more royal icing and let it sit longer to harden. I think if it was thicker, it would've held up much easier.


Check back at the end of the month for a flower pot full of sunflower cupcakes!

Happy June!